Ultimate iPod Dock Phase 1


Ultimate iPod Dock
This months lab project is the biggest and most ambitious to date. In fact it is so big it will be in two parts. The aim is to build the sexiest ipod dock ever made.
The idea
Make a super Hi-Fi iPod dock built in a silver mannequin. The goal is to create something that looks like a sexy 1920s robot lady which sounds better than almost any iPod dock on the market.
The body.
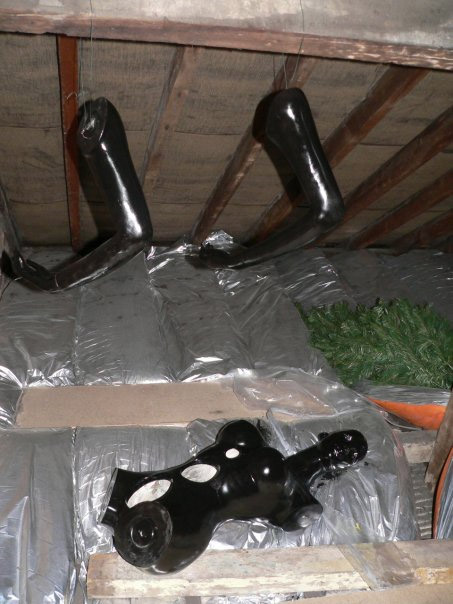
After a lot of searching on the net I found the perfect mannequin for the job. I chose this one for three main reasons
1 - It looks quite lifelike which will help the finished product look classy and it is made of quite thick fiberglass which should not need too much bracing.
2 - The mannequin is kneeling down, this makes it more stable ( you can put speaker spikes in the knees ) this will help give good crisp bass and stop it from falling over.
3 - It has the ideal cleavage for an ipod to nestle in ( well where else would you put the dock )

The amp
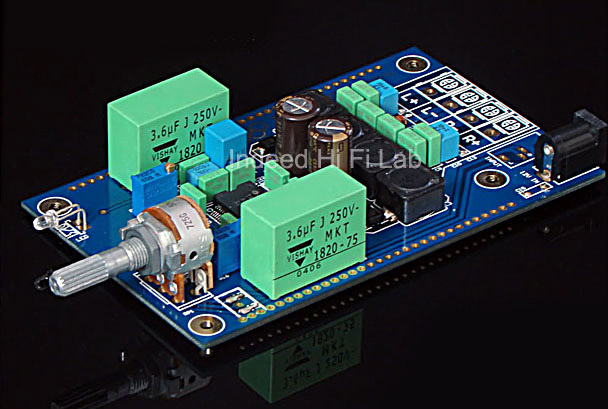
After a great deal of research I found the ideal amp. A class-T amp is a solid state amp based on the tripath chip, they give amaseing sound quality but don't get too hot. To get the best out of it I will also up rate all the caps and resistors to audiophile ones. People in the know compare the sound to that from a valve amp - Warm and punchy. Like valve amps, the highest quality tripath amps have quite a low RMS output - around 30W (15Wpc) so I will need to pare it up with some very sensitive drivers (90db @ 1W 1M or above) in order to make sure it is still nice and loud
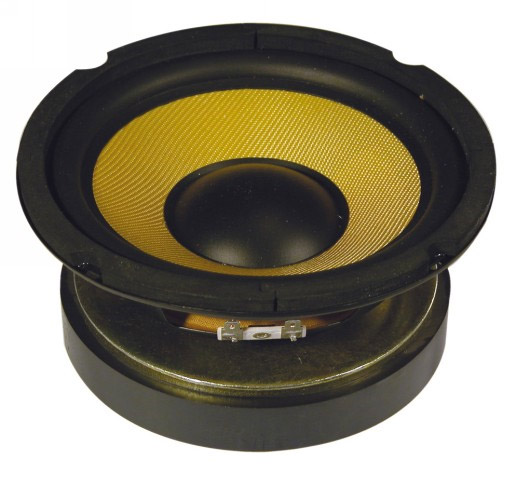
The Drivers.
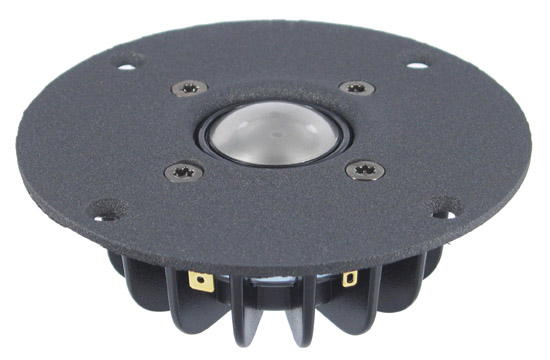
This choice could make or break the project. The drivers need to be very high quality and equally importantly designed to work in a cabinet with a smallish internal volume. The tweeter was not too difficult to sort out as they are less fussy about the enclosure, I went for a titanium coated silk dome tweeter for its excellent clarity and ability to radiate the sound well ( should help it fill a larger listening area ).
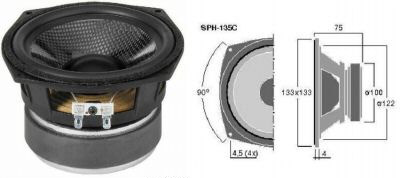
Then I had to find a mid/bass drliver. It could not be more than 6" but still had to pack plenty of punch. In the end I went for a super high tech driver with a carbon fiber cone and ferafluid cooling, very expensive but amazing sound quality.
To bolster the bass I decided to add a sub woofer - for this I will use a kevlar sub driver for good deep bass.
Other Electrics
The tripath amps can not be bridged to make a mono amp. To get the best out of the system I went for a high quality 2 way crossover to run the tweeter and the smaller bass/mid driver on one channel of the amp. Then running the second cannel of the amp through a specially designed low pass filter the drive the subwoofer without muddying the midrange.
For all the internal cabling I will use QED silverEX cabling for its clarity of sound. I will also put an external loop on the back of the mannequin so you can also use your own amp or the internal one.
For the dock I will use the official apple one as the sound is good and it comes with a remote control I am planning to put an external loop on the input as well so you can plug it into any external source.
Other Bits and Bobs
I will need fiberglass resin and matting to strengthen parts on the body. I will need to get some wooden hoops made up to mount the drivers in. I will also need some little sundrys like bolts, filler, spade terminals, banana plugs and things like sand paper and airbrush paint.
Lets get started
Testing the electronics
The first thing I did was test all the electronics. I built up all the electronics in a cardboard box. All drivers and crossovers were working brilliantly and were plenty loud enough to bring my neighbor round to ask me to turn it down.
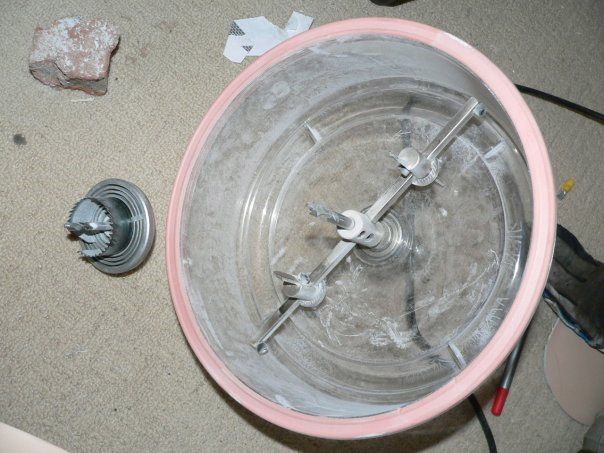
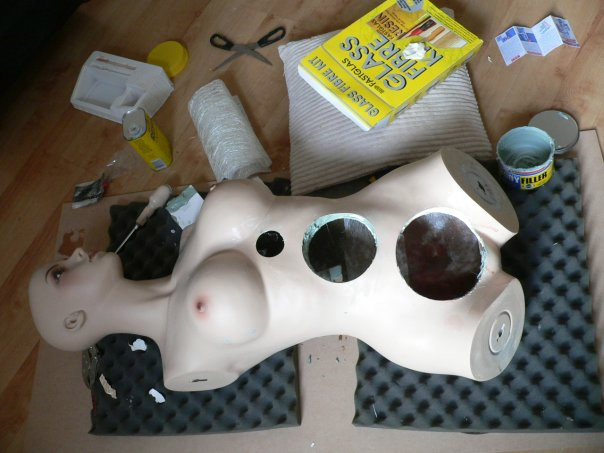
Cutting the holes.
To make the speaker holes I needed a special adjustable hole cutter. This is one of the coolest things I have ever used, with its spinning blades making it look like some kind of sci-fi torture device.
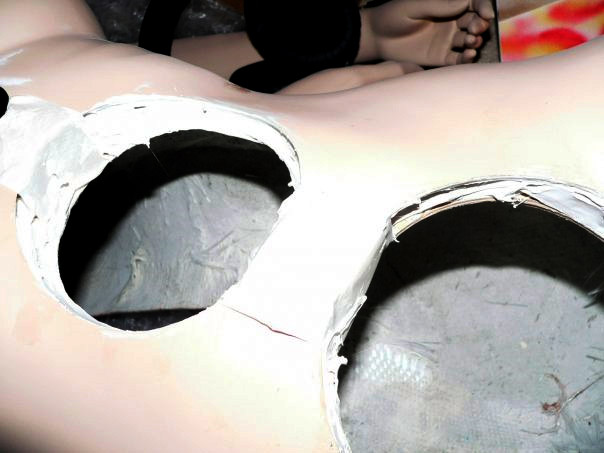
I then used a normal hole saw for the tweeter hole. To get the drivers in to the body. I also cut a hole in the back which I will mount the external connections later on in the project.
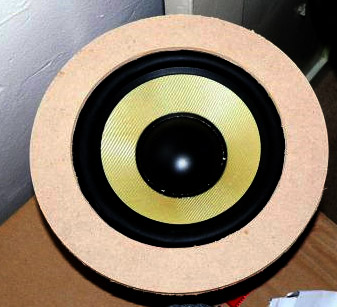
The speaker mounts.
To make flat faced speakers fit nicely in a curved body. I needed to cut some wooden (MDF) hoops to mount the speakers on to.
Then used loads of gripfill and body. filler to mount and seal the hoops to the body.
Now to reinforce the whole thing with lots more fiberglass and body. filler to make sure it wont crumble under the weight and bass.
Tuning the speaker enclosure.
The next thing to do is line the inside of the body. whit a special sound absorbing material. It is a bit like plaster with fluff mixed in. It should help give a cleaner sound and stop the fiberglass from resonating.
I also neatened up the wholes and sanded the whole thing. You can see from the picture that I have also drilled the wholes for the volume control and it will have a matching rotary on off switch on the other side. I have also started work on the patch panel for the rear of the ipod dock

Undercoating
To get the chrome effect I wanted the whole thing needed to be undercoated in black and then 2 layers of clear varnish before the mirra chrome paint is applied